Showing posts with label renovation. Show all posts

Saturday, February 2, 2019

A Cottage Kitchen!

You guys this post is a long time in coming...but Ta Da! Kitchen fitted!  Here is a quick kitchen recap...
I don't miss this nightmare 'kitchen' at all... no storage, questionable electrics, sink that didn't drain, or alternately leaked onto an outlet that was for some reason installed underneath of it.. 
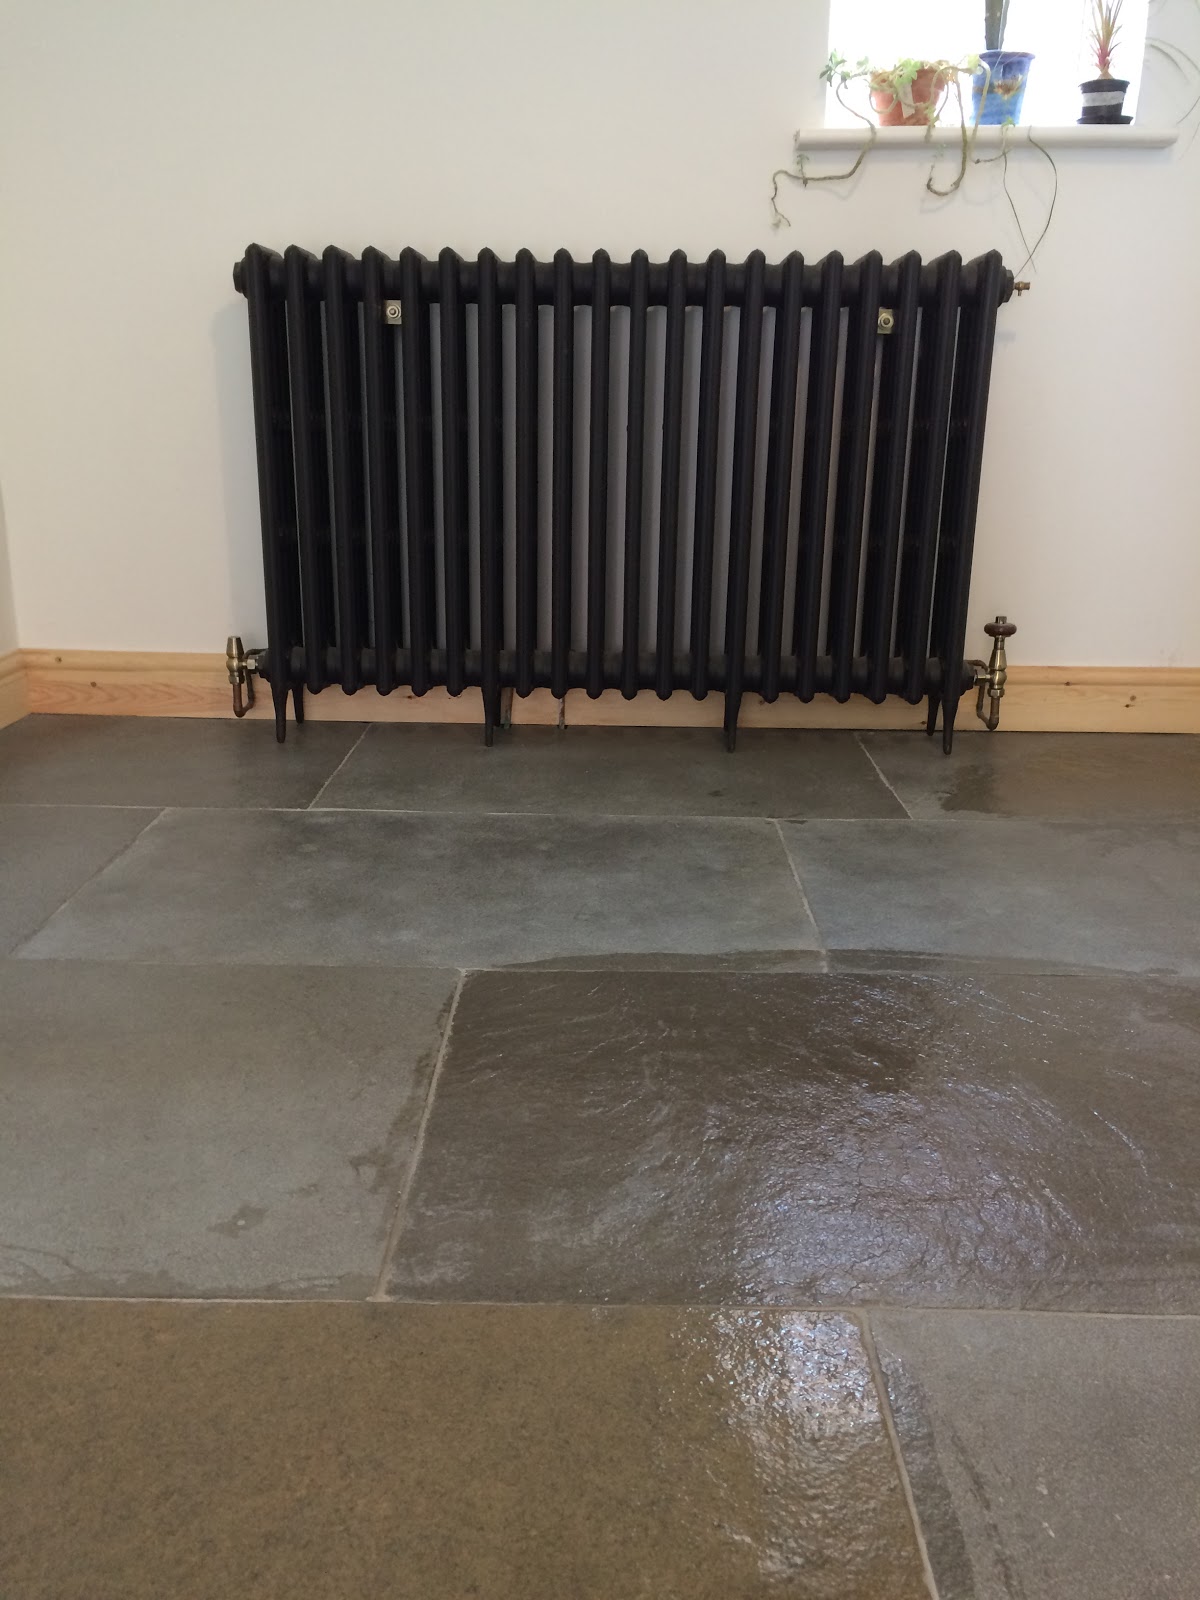
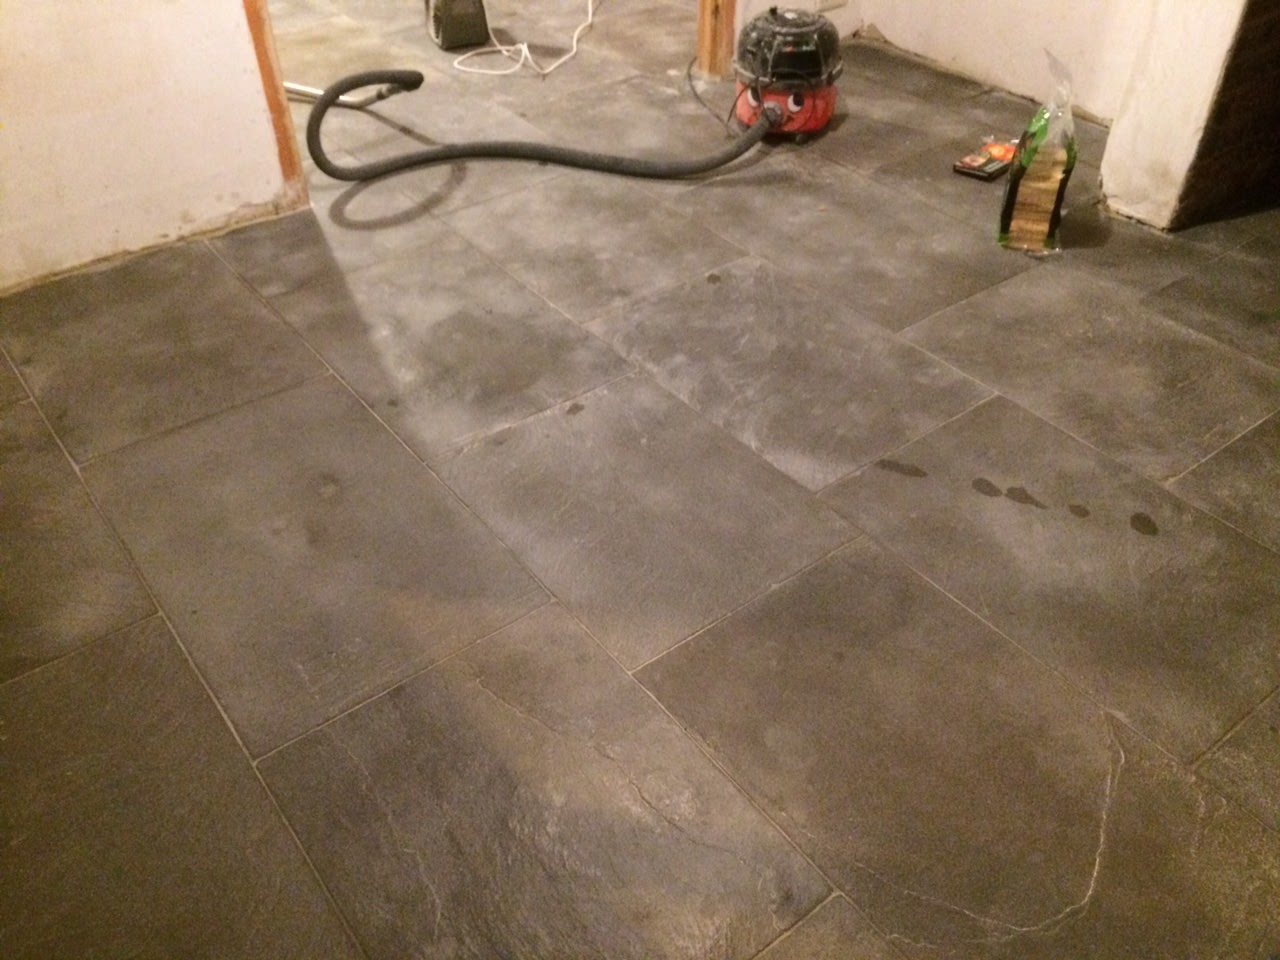
Mr.F stripped everything out of the kitchen, and I mean everything.  He started from scratch to create a dry and level base for the stone floors!
I was lucky that I didn't have to live here during the installation even though it went much more smoothly than the bathroom renovation catastrophes, feel the pain here and here.
Fun kitchen deliveries!
We decided to have the kitchen professionally fitted, which came with its own ups and downs but now that its in and we've lived with it for a while (a year, yes that is how long it takes me to get around to blogging.)  I'm already thinking about how to tweak it.. mostly just fun stuff like shiny brass handles and painting the cabinets. 
Waiting for installation!
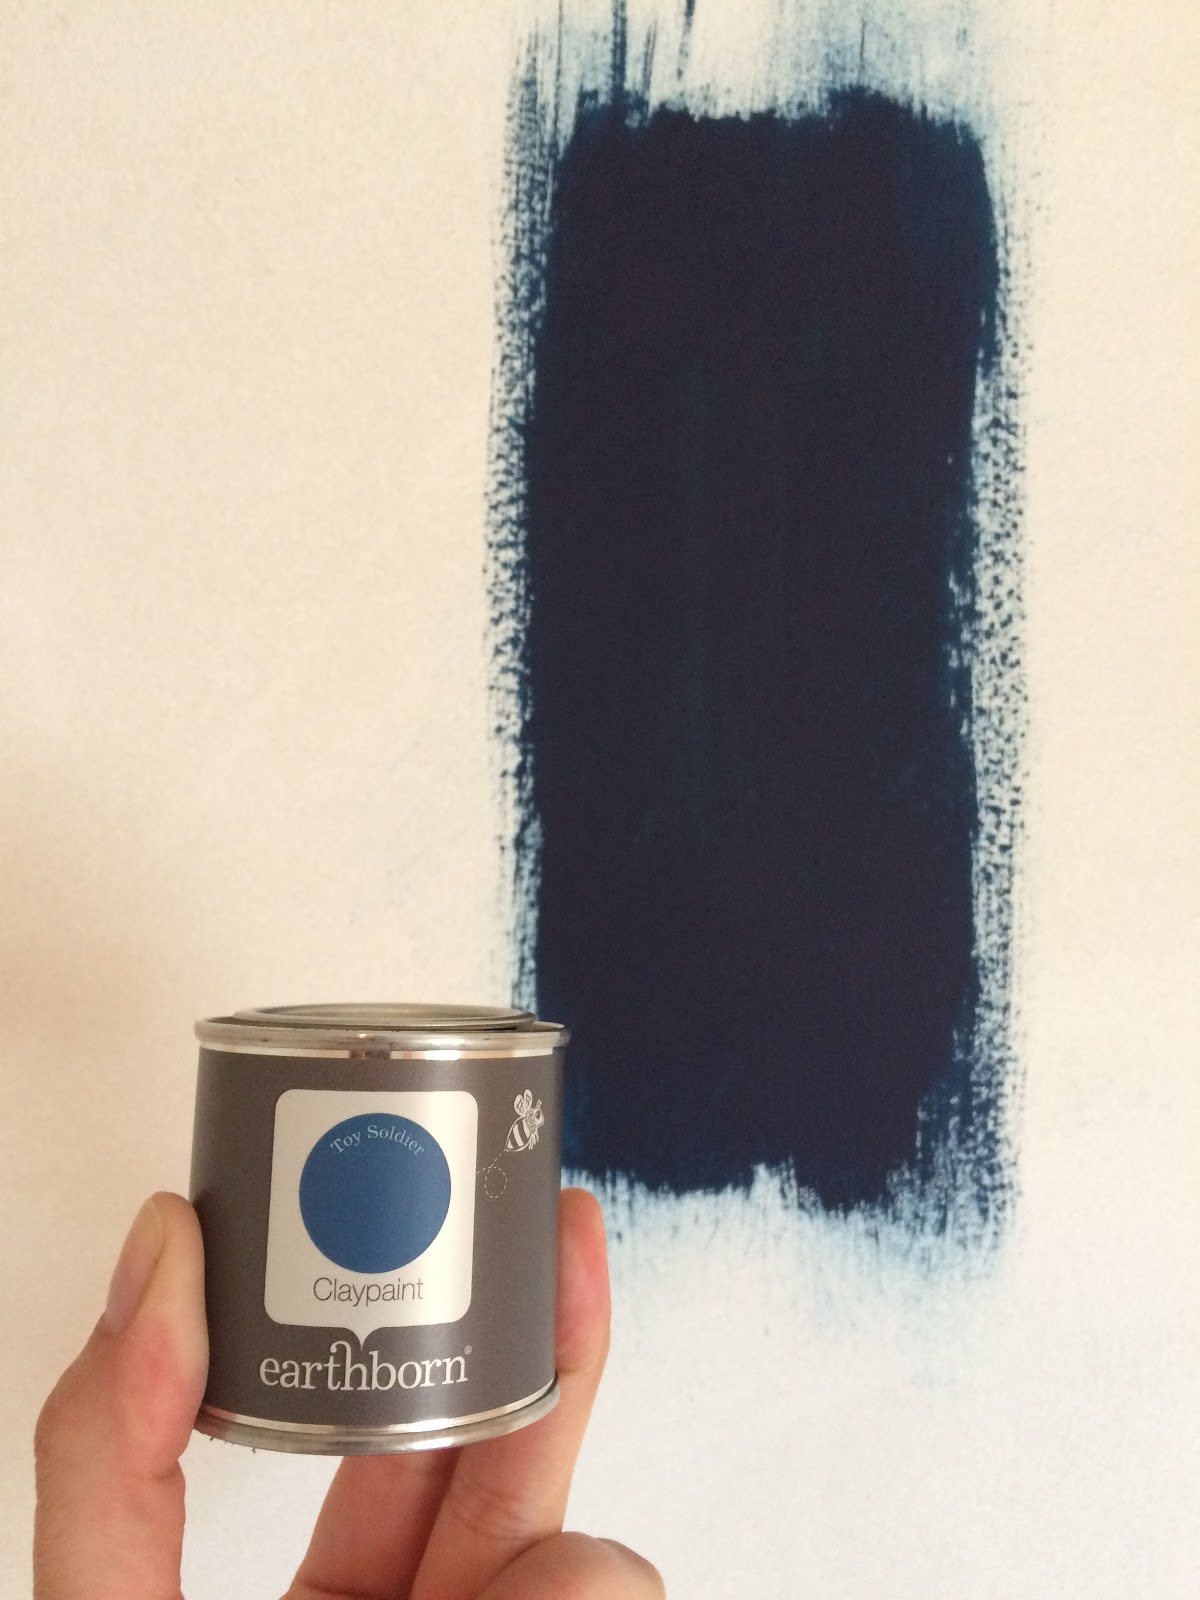
 The cabinets are primed white, and originally I thought white and bright was the way to go, but it shows everything and I've really been feeling the deep jewel tones in decorating lately.  So maybe a deep ruby red or a sumptuous dark plum paint color is on the horizon..
What color would you choose?
We went for lots of classic cottage kitchen features like the farmhouse sink, the breakfast bar, and butcher block counter-tops.  The counters are a beautiful light Maple, a material traditional to Victorian kitchens, I love them but I'm not sure I'd do it again.  The Maple stains easily so we have to be careful to always wipe dry spills, in fact its probably time to oil them again.. add it to my list.  
The scene of frequent cooking shows staring myself.  
Check out those gorgeous backslash tiles we had exactly the right number left over from tiling the bathroom.

Ok so, what color would you paint the cabinets?

-Nikki


Sunday, November 12, 2017

Bathroom Tile - And Color Reveal!

The fun part first; Tiling is finished and we painted the bathroom blue!  We ordered a few samples of Earthborn Claypaint for the bathroom and ultimately went with Toy Soldier for a dark midnight blue color.  Which looks amazing and dramatic against the bright shinning tiles!
  Something I like about these specialty paint lines is actually the smaller color selection, so I can't be paralyzed by to much choice (today's theme).  That is not to say they don't have a good selection, its just way more manageable than the thousands of colors and shades to be found at certain big box stores.  I love this color, it came out beautifully rich and dark, it has a sumptuous, luxury feel to it.  
Toy soldier is the dark swatch on the left.
One of the negatives to long distance DIY is having to choose finishes I haven't actually seen or touched.  This is frustrating for both of us, for instance, it took me weeks to choose the wall tiles for the bathroom.  I felt the need to look at every possible tile option online, while trying to envision them in the space (talk about paralyzed by choice!)
Ultimately we went with these beautiful Winchester tiles, handmade in England, in a gorgeous white called Papyrus.  The tiles are actually a few different shades of white, they are an extra long subway tile and we opted to use white grout as well.
Pisa tiles for the floors.
 In stark contrast to the difficulty I had in choosing the wall tiles, are the floor tiles.  Last June when we realized the floor would have to be tiled, Matt and I went together and looked at some options.  In about 20 minutes we picked three samples, brought them home, and in another 10 minutes, we had ordered our favorite, so easy.  
It was a huge relief, to both of us I think, to realize that we were on the same page and that all we needed was to be in the same place at the same time.  After all the delays, and dragging of feet on choosing finishes, this really put things into perspective. 
So the floors were leveled and installation began again, including the shower tray, finally!  Matt sent me lots of progress shots of this, it was an exciting time!  I have tried my hand at tiling on a much smaller scale than this and it still took several hours, I can only imagine that I would still be working on this if I'd taken it on myself.. tricky since I don't live there.  So glad we hired a professional, he did an amazing job.
 In the shower we decided to build in a little shelf/bench, this happened while I was away, but it came out just as I envisioned.  You can see the unfinished shelf here and the pipes before the tiles went up.  We had already grouted the other walls before tiling the shower, (delayed while waiting to install the shower tray, which was delayed by the flooring issues, a tangled web I know) so that by the time the herring bone wall went up we had already committed to white grout. 
Before grout.
I got a little worried about the white on white with the tile and grout.  Before grouting the pattern was in high contrast, afterwards its much more subtle.  I've decided I like it and it opened the way for us to do something really dramatic with the paint color, otherwise I probably would have stuck to "safe" colors, like grays and whites.   
After grout, everything shines like ice and the natural tiles reflect the light in a rippled textured pattern.  As the tiling neared completion, the room looked amazing, it feels so high end, so luxurious.  I can't wait to get in there with a candle and a plant and call it done.      
Gorgeous right?  And a huge space!  There were some side effects to all this luxury though.  Remember the story of When you Give a Mouse a Cookie?  Well when this mouse saw the beautiful tile it made other parts of the room look worse in comparison.  Most notably the trim, which we had to strip, clean, and repaint.  It also lights a fire under me to bring the rest of the house up to par.
Next time, Fixtures!
-Nikki 

Tuesday, November 7, 2017

Bathroom Blues - Delivery Drama

So while the Bathroom Floorboard Mistake was going on last June, we also had some delivery and installation drama. 
All of the beautiful new bathroom fixtures (except the vanity and sink) were delivered together in this neat, not so little, package.  This thing was about 6 feet tall and had every little piece boxed up and in the tub.  
We took the packaging apart and got all the small stuff inside.  The tub was difficult as Matt and I had to bring it into the house on end and then up our tight turning stairs.  We almost didn't make it, with all three of us; Matt, the tub, and I, suffering a few scrapes and bumps.  In the end though, success!  The tub is upstairs! It came with gorgeous chrome claw feet too which you don't get to see until the final reveal.  
The real drama of the delivery was the HUGE glass shower screen, this thing was not going up the stairs, it was to big by several inches.  Oops.  I'm actually quite proud of how we solved this one though....
After we realized that there was no way we could get that piece of glass up the stairs on our own we had a moment of panic (Maybe more than a moment.)  I started calling moving companies who claimed to do sofas, pianos, etc through upstairs windows.  By this point it was rather late on a Friday evening, and we were feeling really stressed and dejected, so when I got a hold of Sofa Assist it was a huge relief. 
 
Sofa Assist came out and expertly dismantled the window, lifted the panel through, and fixed the window.  In fact that window didn't work properly before, now its perfect. The huge shower panel lived in (what will be) my studio for a few weeks before being installed.  
The installation delay was directly related to the shower tray drama.  The tray couldn't be installed because the floors weren't level (this contributed to us scrapping the floorboards and going for tile), plus the pluming had to be finished.  
By pluming I mean the pipes had to be fit into the wall, a plaster and brick wall shared with our neighbor.  She was very sweet about it, but I suspect it is difficult to live next to a renovation when they spend all day hammering into the wall.
Now though the pipes are fitted, the installation is done and the tiler has been able to get in and finish the walls and floors, Spoiler Alert: it looks amazing.
That same week, we ordered the sink and vanity unit from Ikea (see below.)  I usually love Ikea, but in this case Matt had to jump through a lot of hoops for this sink.  I think my advice would be: If you can't see it and take it home day-of from Ikea, don't bother attempting a delivery. 
IKEA HEMNES/RÄTTVIKEN wash-stand with 2 drawers
IKEA HEMNES/RÄTTVIKEN wash-stand with 2 drawersIt is gorgeous though, a big porcelain top, chrome faucet to match the others and loads of storage in the big drawers.  Stay tuned for the tile and wall color reveal!
-Nikki


Wednesday, November 1, 2017

Bathroom Blues - Wooden Floor Woes

If it seems like it has been a while since I last posted that is true and directly related to my process of grieving and getting over my failure with the bathroom floors.  I didn't want to discuss it until everything was beautiful and finished..HA.  In case you've forgotten where we started...

Let me preface this by saying that I originally wanted tile on the floors but was woo'd by the desire to preserve as much original character of the house as possible.  Matt really liked the look of the wooden floorboards in bathrooms and eventually won me over (with reservations.)   We went round in circles about water getting under the boards and the poor condition of the boards, but forged ahead anyway.  (I really need to start trusting my gut on these things.)  The plan was to bring some light into the dingy space, I effectively wanted to clean and white wash the boards and go for a sort of Scandinavian-vibe.
Last June, Before and after sanding.
The boards had been stained, painted and heavily damaged over the years.  Seriously, we had some horrid, messed up floor issues.  Woodworm, nails, cracks, unevenness, and more.  This is one of the most telling photos.. some of the worst woodworm damage...
I used Osmo wood filler as an attempt to even things out.   The product itself I like, application is easy and it works as expected, but I think the boards were too far gone. 
Even a liberal application of wood filler didn't seem to help (though I told myself it did), and potentially made the situation even worse, by high-lighting the "character" as we called it.  We were rushed, trying to finish in only a week, but I think I could have spent a month on those floors and still not been happy.  So even though we weren't ready, we moved on to the next step.. long distance diy projects (and relationships) sometimes have a time crunch, deal with it. 
The Osmo oil is fantastic, but it can't work miracles.  Nothing wrong with the product, just our horrible floorboards.  We used a white tinted, water resistant oil recommended for floors.    
Working late into the night... I'm not holding a phone to my ear... You can also see the unfinished shower area.. the real bane of my life as all this was going on last June, during a heat wave.  I think shortly after this the love of my life went out and found pizza and a bottle of wine. 
Over two evenings I painstakingly painted on two coats of the white tinted Osmo oil and a final protective clear sealant.  Look at that gap... come on past me.. you were never going to accept that! This was the result. 
.
.
.
I tried to love it.  I really did. I never would have admitted I didn't if Matt didn't finally say he didn't really like it.  Then it all came pouring out, I hated them.  They were still rough to the touch, uneven, the color was ok but not what I'd envisioned.  We probably would have been better off just painting them a high gloss white, because I hated these floorboards at this point.  
So then he said the magic words.. "lets go look at floor tile tomorrow" Is there any mystery as to why I love him?
Here is a final before and after of all the work that went in.. top is the unfinished hallway, bottom is the bathroom.  A major difference, too bad it was wasted effort... still I'm glad we tried.  Otherwise we would have always had a nagging feeling that the wood may have been a beautiful and cost saving style.  
While all this was going on, the tiler was working on the walls and we had a major curve ball with the actual bathroom fixtures delivery, tune in next week for that minor catastrophe.

-Nikki


Saturday, September 9, 2017

Sealing the floors.

For background on the floors start here, we used a beautiful Aged Heritage Limestone. 
On my last visit the floor installation was finished but not yet sealed.  A lot of time and money had gone into building a vapor permeable floor and sub-floor, which should prevent issues with rising damp.  Naturally, a lot of anxiety went into choosing the right finish to protect the floors while maintaining their vapor permeable properties.    
We cleaned them several times, before applying (by hand) a special vapor-permeable 'damp-look' stone floor sealant called Prevosil. 
Prepping and sealing the floors was a labor of love, I felt like Cinderella on hands and knees scrubbing that floor, worth it though in the end.  There was a rare heatwave during my visit and I have to say I took full advantage of the cool stones, laying on the floor to cool off (it wasn't as weird as it sounds I promise).  Speaking of heat, get a load of the gorgeous cast iron radiator Matt ordered!
Once finished we tried out some rugs!  Both were vintage finds from eBay or Gumtree.  Completely in love with both for very different reasons.  Also on display is our fancy new chair!  
Matt has gotten very good at assembling my Ikea whims..
I'm considering this rug to be one of my better Friday Finds.  I experimented with cleaning it, using diluted dish soap and the garden hose, and learned two things.  First: Rugs are extremely heavy when wet, and Second: wool smells awful when wet.  Luckily it dried well and did come out cleaner. 

See you next week when I'll be back in Tewkesbury!
-Nikki


Tuesday, August 29, 2017

The Woody

I know its a silly post for August but, just look at this lovely wood burner, hand made in Wales by the Chilli Pengiun company.  They are super efficient, have a sleek modern look, come in a range of sizes and colors, and there is even one with a little pizza oven!  
This style?  Its called the Woody.
  Plus those flagstones going back into the fireplace and the excision of that hideous and dangerous old hearth stone?  A total flooring coo.
The floors are finished and sealed, post coming soon about our living room and rugs!
<3 Nikki


Tuesday, March 14, 2017

Stone floors!

The downstairs floors have been re-done and they are looking very lovely.  Under the linoleum we had an uneven concrete slab and quarry tiles, all of which was sitting on dirt and rubble.
Matt had to do a lot of digging out to safely remove all the bad old stuff and prepare for laying in the new sub-floor.  
They dug down to dirt, literally, that is a dirt floor in the kitchen, and living room.. and dining room... But soon enough things started going back in to construct the new sub-floor.
The new sub-floor consists of layers of foam glass insulation with limecrete on top meant to be vapor permeable.  It was fun for me to see these progress shots each evening.. especially because I wasn't living in it.
The whole process took them several days, but resulted in a gorgeously level new floor which should also help stop the rising damp from destroying our plaster walls, because at the same time as all this flooring fun...
...Most of the downstairs plaster was being redone.  To deal with that same rising damp issue, the bottom half of the walls had to be demo'd and re-plastered. I was very glad to not be around for all this, I know the disorder would have made me go a little mad.
The stone for the new floors is an Aged-Heritage-Limestone and before deciding we looked at several other samples.  Naturally I spent an entire afternoon moving the samples around to different rooms to see how they would look.  Below you can see my three samples, the linoleum we started with, as well as the ugly hearth stone, and the partially hidden mess that is the old cracked tile under the old wood burner.
I had this vision of bright whites/ivories everywhere in the house, but in the end I was won over by the ripples and texture of the gray limestone.  They look something like river stones and what I really like is the fact that they are common around Tewksbury.  Once I started looking I saw the texture and color used in several other old buildings and on some of the sidewalks!  
We are still trying to decide how to seal it though, the options are a 'wet-look' or a 'dry-look'.  Above it is dry (very natural, maybe a dusted look to it) and below is right after mopping (slightly glossy, shiny).  Which would you choose?
If you compare this photo of the finished stone floor in the kitchen to the earlier process photos of the same space you can really see how far we've come!
Now the downstairs is nearly finished structurally and a post on the kitchen is coming soon.  Walls have been whitewashed, the furniture moved back into the space, and I've been obsessing over rugs.  Now, final flooring thought this week, check out my new Kilim area rug!
Thank you Ebay for existing!  This is a colorful over-sized beauty from the 1940's all the way from Istanbul and I am so in love.  It currently is living with me in Maryland, but I can't wait to see it against those stones in the cottage! One side is very faded for a more muted look and the other is still incredibly vibrant.

- Nikki

Sunday, January 15, 2017

DIY Outlet Upgrades!

As promised I have an overview of our process installing new outlets into what we think will be the master bedroom, we are not electricians and this is not a how to guide, always consult a professional.  (We did end up having a proper electrician do the rest of the house and he checked out our work.)
Now that the disclaimer is out of the way... we needed more outlets in the bedroom, and Matt had the brilliant idea to upgrade to a set with USB ports, so we were pretty excited and motivated.  
The upgraded receptacles only cost a few dollars more than the standard and came with installation instructions.
We measured out the size of the bed so that the outlets would go outside of it and got about securing the casing to the brick.  Drilling into the brick was tricky because, in an old house like ours, the bricks are not uniform, some were way to soft and crumbly, others were very very hard, the mortar was to soft as well, so there was some trial and error here.  The first of the two outlets we installed went back in the original space, IE: where the wires were coming up from the floor. 
I threaded the wires (electricity was shut off at this point) into the case and Matt took over attaching the correct wires to our new outlet face as well as separating out the ones which were to go off to the second new outlet.  (See the gray cord going off to the left.)
The second case and cover went faster than the first, though there was some hanky panky using the electric drill to install because to use the drill the power had to be turned on... Do Not Do This! But glossing right over that...
Look how pretty!  And it works!  Our next move was to use this metal strip to secure and cover the wire to the brick, protecting it and us from any reno in the future.  This took forever to get right, but with some good brick anchors for the screws, careful measuring, and pilot holes we got it done.  
Very proud!  This was one of the bigger projects that we've taken on and successfully finished all in one day with no outside help.  When we plastered this room the wire housing was secured further and covered over, the outlets are now nearly flush with the surface of the wall and rock solid.  I'm so glad we made the effort here, we really needed the extra outlets in there and now with the built-in UBS ports we have a plethora of options. 
I should probably pick out some cool bedside lights..
- Nikki