Wednesday, April 13, 2016

Building a Terrarium - DIY

I love plants, I think every room can be improved by some living color, but I killed the first few plants I ever had.  Basically I over-loved them with too much water, bad planting, and not looking into the basic requirements for their survival.   
One of my worst plant murders was the planting of succulents in a "cutesy" terrarium, this is a popular look right now, but it goes against the natural environment these plants thrive in.  Succulents and cacti prefer low-humidity, more arid conditions, to be deeply watered in the growing season, but left alone when dormant, the opposite of a terrarium.
So after finding a large glass jar with cork lid I started looking for moisture loving, medium light plants.
I used white stones on the bottom and then a clean dust sheet to keep the soil from falling through.

I added a layer of perlite, and a little soil, then pulled out all the tiny plants I'd picked out.  This is the moment I realized that the mini orchid was still way to big, I returned it.  I added soil and figured out the plant arrangement. 
Pretty! 
Once the plants are arranged give it a good watering, this will also help clean the dirt from the sides and leaves.  I let mine sit for a day then popped the cork in.  Ideally these plants will thrive and the only time I'll need to open the jar would be to prune if things get too big.
Finished!
I love terrariums for the rare occasions when I can cheat and open the lid,  the smell inside takes me strait to a lush rain-forest.  Since this was a thrifted jar and tiny plants the whole project cost less than $15.
- Nicole


Monday, April 11, 2016

Roof Adventures and Lime Plastering.

The cottage recently had some roof work done, thanks to Matt and family.  A process of laying lead in the valley of the roof peaks, so that water can't get into the attic and house.
Fancy roof!


The lime plastering has begun in the front bedroom, meaning we are starting to have walls again.  After re-pointing the loose brick and wetting the wall thoroughly, Matt applied the first layer of plaster.  
Lime putty!
Mix lime putty and sand to make plaster.
The plaster goes on about 10mm thick and Matt was careful to keep misting the plaster so that it doesn't dry to quickly.  If the plaster drys out too fast it could crumble and fall away from the wall.  After a day Matt scored the first coat, giving the second layer something to key into.
Right there between the corner and window! New plaster! Woohoo!
The second layer is also about 10mm thick, but meant to be very flat.  This layer is scored in a swirly pattern in preparation for the final coat.  
The third layer is a very thin skim coat, made with a finer grain of sand and a higher ratio of lime putty to sand, to give a smooth appearance, as opposed to the coarser bottom layers with sharp sand and hair.  
The plaster is left to slowly dry and eventually we will paint it with a special, breathable paint, like lime-wash or clay paints.  So that the plaster can continue to work, by letting moisture escape the house.

I also have an update on the hidden fireplace from the back bedroom, there was literally a skeleton in the wall.  Matt has removed the extra bricks and cleared out a space.

- Nicole


Friday, April 8, 2016

Friday Findings - Fun Stuff!

I picked up this weeks Friday Finds at two local thrift stores and I'm struggling to decide which is my favorite.  There is a little copper tray (with copper-craft guild seal: a mid-century find to add to my collection), a little plant pot, and a very large glass jar.  All for less than $12, and yes I have big plans for that jar, terrarium post coming soon!
- Nicole

Wednesday, April 6, 2016

Dresser Makeover - Experimenting with bleach.

Remember this little chest of drawers from the Friday findings?  Well, it got a make over, the goal was to update the look for a fresh clean natural finish.  Read on to find out how!

Friday, April 1, 2016

Friday Findings - Picture Frames and Vintage Art

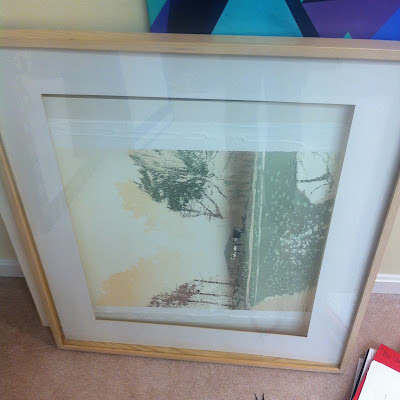
I am always on alert for frugal framing options, and this week I came across 3 very large wooden picture frames.  Framing can be very expensive and I tend to need a lot for wall art as I like to both create and collect.  So spotting frames at garage sales (this huge frame for only $2!) or at the thrift stores is a great game for me. 
The best is when a frame comes with a white mat already!
These came out of the condo.
About two years ago I created my first gallery wall in Matt's old flat, using mostly second hand frames and original artwork.  
Looking at that gallery wall I see some things that worked and some that didn't, now I can't wait to do the next one.
I like to mix in photos (Matt has a great eye for photography) and some 3D art for texture, like this small bird embroidery I found on one of our day trips.
How cute is this?  Found in a charity shop in York.
I like buying vintage artwork when visiting new places, rather than the typical tourist chachkis.  Using those pieces to decorate results in something personal and unique to us; every piece tells a story, and acts as a one of a kind souvenir. 
From our day in Kutna Hora last fall.
Vintage book prints and a water color we found in an out of the way antique books store in the Czech Republic, all for less then $10.  Check out the whale print, all the names are in Czech! 
Another vintage book plate, Matt found this one in an antique book shop in Sheffield.
I've always been quick to fill my living spaces with art, so to me blank walls represent opportunity.
How did your favorite piece of wall decor come into your life?  What is it?

-Nicole